Many people have never used a da sander before, and are not sure how to use it. But don’t worry- this blog post will show you just that!
In this article, we’ll cover the ways of using a da sander, as well as some tips on how to improve productivity with one.
So, without any further ado, let’s get to the point!
How to Use a Dual Action Sander
Here are the steps to follow for using a da sander efficiently-
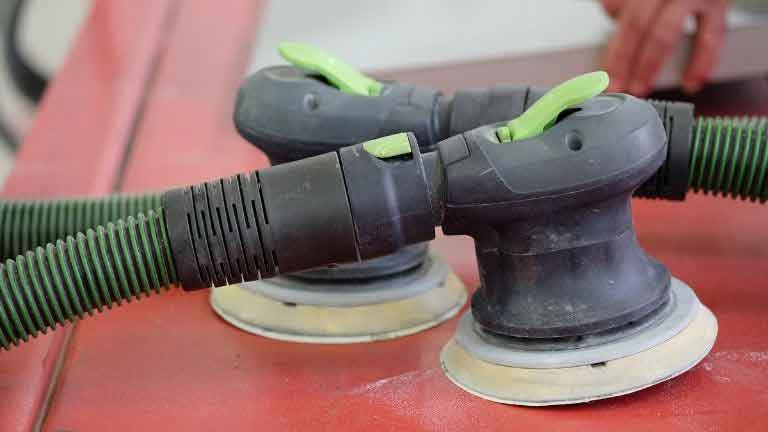
Attach the Sanding Pad
First, you’ll need to attach the sanding pad to the machine. Whenever you shop for a sanding pad, make sure it fits your da sander. Many times people buy pads that don’t fit their machine, ending up losing time and money. And importantly, it’ll hamper your workflow.
Power the Sander and Start Sanding
Next, turn on the sander and slowly push it across your workpiece in a back and forth motion, applying pressure to keep everything flat; make sure not to go too fast!
Ensure you’re using both hands. You may see professionals using one hand to accomplish mindblowing results. Don’t fall for that. You won’t be able to control the sander when you are new to this.
Finish and See the Result
Finally, stop when you’ve completed a full pass. You may see some uneven surfaces when you are new to this. To solve the issue, run the machine at the slowest speed and blend the uneven surfaces softly.
Repeat until the desired finish is reached!
Things You Should Keep in Mind when Starting Out
While the process is pretty straightforward, people often mess up things. Here are the things you should keep in mind to avoid messing up-
1. Check the Owners Manual
Before starting to use the machine, you must check the owner’s manual. This will have instructions for you to follow and can have specific tips that may not match with other sanders. So, give it a read.
2. Configure the Machine Correctly
Almost all sanders nowadays come with multiple functions like variable speed, dust collection, and intensity. Make sure to configure correctly before working on the workpiece.
3. Double Check the Sanding Pad
This is the most important factor. Never ignore this step when you do sanding. You must check the grit size before attaching it to the sander. Incorrect grit size can cost you hundreds.
4. Hold it Firmly
Don’t be afraid. Hold it firm so that it doesn’t move uncontrollably. You should be able to move it according to your wish, not like the machine guiding your hand to wherever it wants.
5. Go Slow
People often get excited and start with high-speed settings. This is a great mistake and it will give you hard time controlling the sander. So, start at lowest or mid-low speed settings and increase the speed gradually when you get hang of it.
6. Keep the Pad Flat on the Surface
Don’t angle the sanding disc on the workpiece. Doing this will leave swirl marks on the surface and dual action motion won’t work. So, keep the sander flat on the surface and go back and forth to accomplish the desired finish.
7. Don’t Put too Much Pressure
While we ask people to hold it firm, people often gets misguided and starting putting excessive pressure on the surface. Don’t do that.
You should keep the machine firm in your hand while resting the machine on the surface without putting any additional pressure.
8. Use Overlapping Sanding Motion
When sanding the surface, make sure to overlap the previously sanded surface to blend it perfectly. This will give the surface a finer look hiding any negligible blemishes.
9. Maintain the Tool Perfectly
It is important for your tools to be in good shape so they can do their job properly. So make sure you take care of them and protect them from damage by putting them away dry and clean after every use.
Can You Sand Wood with a DA Sander?
Yes, you can use the dual-action sander that you bought for auto detailing to sand wood. However, for sanding wood, the process is a bit different than that of auto bodywork. You need to use different sanding discs with different grit number to get the desired result.
Can You Buff with a DA Sander?
No, you can’t use the dual-action sander for buffing. However, most DA sanders nowadays are multifunctional. You can easily replace sanding disc with a buffing pad and convert your sander to a full-pledged buffer within seconds.
Make sure the machine you have has the feature and the buffing pads are available to purchase.
Can You Polish a Car with a DA?
Yes, if the dual action sander is multifunctional like we discussed above. It should allow you to replace the sanding pad with a buffing pad so that you can utilize the same machine for sanding and polishing.
If the machine is not multifunctional, it won’t be possible to polish a car with DA.
Is a Sander and a Buffer the Same Thing?
No, they’re not the same thing. A buffer is used for buffing and a sander is mainly used for sanding purposes.
What are the Differences Between Sanding and Buffing?
Sanders are often used in auto body work to remove paint defects from the surface of metal or plastic parts before painting them, while buffers can be considered more of a finishing step.
A buffer can be used to apply wax or sealant, remove swirls from paint, and even polish metal surfaces.
If you’re going with sanding as your first choice for the job, make sure that you know what type of surface you’re working on because not all sanders are designed for both dry and wet sanding.
When you’re using a wet sander, make sure that you use a lubricant for the job to avoid scratching your surface.
At What Speed You Should Buff a Car At?
It depends on the surface and at what stage you are working on. Use 2000-2500 RPM when you are compounding the surface and at the finishing stage, you should go at around 1200 to 1500 RPM.
Remember, more speed comes with the risk of more blemishes. Go slow and achieve a shiny finish.
How to Remove Accidental Swirl Marks?
If you ever use a random orbital sander on your work and notice that there are swirl marks or scratches left behind, it’s important to remember one very simple rule: overlap when polishing the surface.
For deeper swirl marks, you may need to use a fair bit of polishing before you see a shiny finish. For softer swirls, you can use storebought swirl removers and apply those on the surface. They are simple to use and results perfectly when the marks are not so deep.
Conclusion
The task of sanding is more manageable when you use a dual action sander. You can do it with ease and in less time than if you were to manually sand down the area. It’s important that before starting, you keep these tips in mind so the process goes smoothly for both your car and for yourself!
First, make sure to test out how much pressure will be needed by pressing on an inconspicuous metal part. Next, start off using overlapping motions while maintaining perfect control over the tool itself-this will help prevent any damage from occurring as well as save you some time overall.