Pioneer car stereo removal can be quite a challenge especially if you don’t have the correct tools for this task.
If you’re not careful, it’s possible to damage the dashboard and other parts of your car while removing a Pioneer Car Stereo. In order to avoid these issues, there are some things that you should know before starting this task.
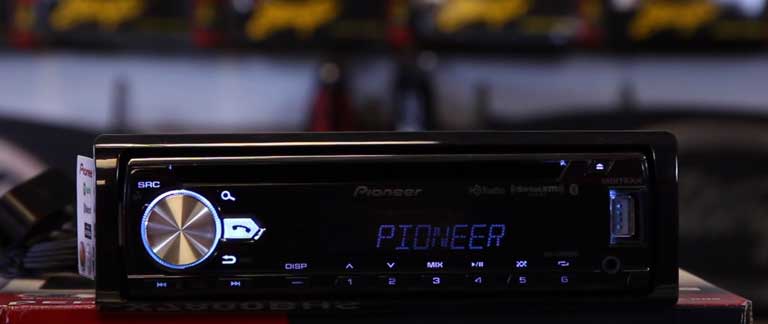
In this blog post, we will show how to remove Pioneer Car stereo without keys. Keep reading!
Steps to Remove Pioneer Car Stereo
Here are the 5 easy steps that you can follow to remove any pioneer head unit model with ease-
1. Disconnect the Battery
The first thing you need to do is safeguard the entire electrical system of your car by unplugging the battery. To do that, get out of your car, pop out the hood, and disconnect the negative battery terminal.
This simple step will disconnect the power and let you work freely without worrying about damaging valuable accessories inside the car.
2. Remove Faceplate
It’s easy to remove the pioneer car stereo faceplate. Get into the car, you should find a button to eject it from the main body.
If the button doesn’t work, there may have a plastic bracket around the faceplate that’s preventing it from popping out. So, gently remove that from its place and try the eject button again. It should come out easily. The only thing you need to do is use a slight pull pressure to get it out of the way.
3. Unscrew the Stereo from Mounting Bracket
Here comes the step where things start to get different based on what model you have. But the process is more or less simple. Some devices are screwed to the mounting bracket and some are simply put into the enclosure and kept in place by some hook.
If there are hooks, there is nothing for you to do in this step. If you see screws, find a screwdriver to get them out of your way. Be careful not to throw them away as you’ll need them again when you reinstall this or an upgraded head unit.
4. Remove the Device
Once you remove the screws, slowly slide out the device. Be careful about how much force you apply to avoid any damage to internal components. Since it’s still plugged in, don’t try to pull it out quickly as this may snap or unplug some crucial cables that help connect speakers and other devices inside your car.
If there are plastic plates that keep the device in its place, make sure you remove them too before sliding out your head unit.
5. Disconnect the Wires
Finally, disconnect the wire. There are different types of wires including power cables, antenna connector, and speaker wiring, etc. The color coding may vary depending on your model so you need to refer to the user manual provided with the system or check online for specific information about disassembling this device from your car stereo system.
Once everything is disconnected, carefully slide out the device.
That’s it! Once you get to this point, all there is left for you is getting a replacement and re-installing everything back again in reverse order. Just remember one thing: don’t apply force when removing any component to avoid any damage to the system.
Now that you know how to remove pioneer car stereo without keys, it should be a lot easier for you to get this job done yourself. Just make sure there aren’t any screws left behind as they can cause problems when reinstalling a new device.
Note: In some vehicles, you may need to remove the air condition vent first before getting access to the stereo. So, we recommend double-checking this in the car owner’s manual so that you don’t get stuck in the middle of the process.
How to Reinstall Pioneer Car Stereo System
Once you’re done with removing your old Pioneer head unit, it’s time to reinstall a new one. Here are some steps that you need to follow-
1. Place the stereo into its place and make sure it sits firmly in its position.
2. If there are screws, secure the new device with them and make sure it doesn’t budge an inch after you’re done fastening everything down.
3. Now connect the power cord and any relevant cables like antenna connections or speaker wires.
4. After that’s done, check the device by connecting the negative battery terminal to make sure everything works well. If it works, disconnect the battery again.
5. Once you’re done with that, remove the faceplate and fix the system into the head unit enclosure.
6. Place the faceplate in its position. It may need a bit of pressure to fully connect. Attach the plastic covering around the faceplate if any.
7. Finally, reconnect the battery again to enjoy your new Pioneer car stereo system without any problems!
Conclusion
No matter how old your car stereo is, you can always upgrade to a new one. Some may just need a better device while some are facing issues like pioneer radio not turn on, or bluetooth memory full.
For some people who have never done this before, the process may feel daunting and time-consuming. But with these simple steps for removing a Pioneer head unit without keys or screws, it’s easier than ever to get started on that project!
There are lots of different models out there so make sure you do your homework beforehand by reading user manuals online or checking what type of model number matches yours in order to avoid any surprises when trying to remove the device from its mounting bracket.
It doesn’t take long at all once you know how; we hope these tips will help simplify something we think most drivers dread doing: upgrading their outdated Pioneer Car Stereo System!
