When you need to reset your JVC car stereo, it is important that you follow the instructions carefully.
The last thing that someone wants when they are driving down the road is for their radio station to suddenly go silent. This article will discuss how to do a hard reset on a JVC car stereo to troubleshoot common JVC car stereo problems.
We’ll go over different techniques as the method varies depending on the model you own. So, let’s get started!
Hard Reset JVC Single-DIN In-Dash Receivers
Unlike Pioneer and Kenwood radios, JVC stereos are pretty straightforward to reset. Here’s what you need to do-
Remove the Faceplate
To begin, you will need to remove the faceplate. There might be clips holding it in place so just wiggle until they come loose.
At the bottom left corner, you’ll see an eject button for the faceplate. Press that and carefully wiggle it out of the system.
Find the Reset Button
You will need to find the reset button. It’s a pretty small hole so it shouldn’t be too hard to spot.
If you’re confused, you can open the manual of your stereo and see which one is the reset button hole. Generally, it’s at the center of the JVC stereos.
Reset the Unit
Once you’ve found it, press and hold for about five seconds with a sim ejector pin or paper clip.
Note that, the reset button must be pressed within 5 seconds of removing the faceplate. So, it is better to be prepared to do the task fast.
Re-attach the Faceplate
Now, reattach the faceplate and see if it works properly.
Note: This process is tested in JVC KD-T711BT, KD-T710BT, KD-TD71BT, KD-SR86BT models. It should work with other similar models as well.
Factory Reset JVC Double DIN Car Stereos
Resetting a double din is pretty much the same as resetting a single one with only slight variations. Here’s what you need to do-
Disconnect USB Device
Make sure that there is no USB device connected to the system.
If you happen to have one, unplug it. Performing the reset function with a USB device connected to the stereo can cause the USB device to malfunction or data loss.
Find the Reset Button Hole
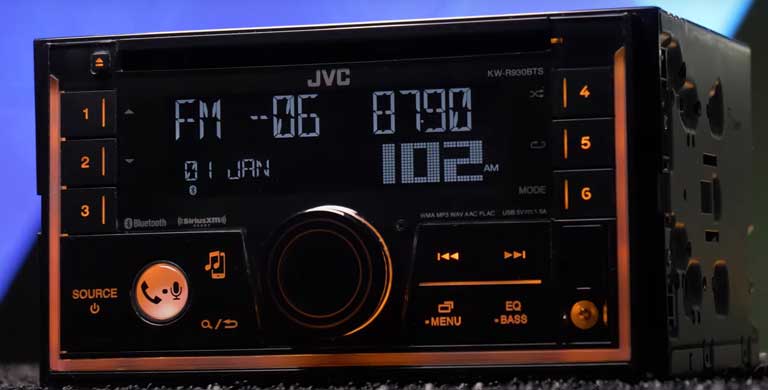
The reset button in the Double DIN units is located at the side of the volume control knob. So, see if you can find a hole. If you’re confused, simply head over to the user manual that came with the head unit.
In multimedia units without any physical button or volume control knob, the reset button is located at the side of the device, typically in the bottom left corner.
Reset it
Follow the same process. Press and hold the button with a toothpick, sim ejector pin, or a paper clip until the system reboots.
Note: The method is described based on JVC KW-X840BTS and KW-M560BT double-DIN models. It should work on similar models, especially the JVC KW series.
Factory Resetting Old JVC Models
Some of the outdated JVC stereo models don’t come with a reset hole, this method should work with those. Follow the steps carefully-
Eject CD or USB Drive
If there is a disc or USB drive inserted, eject it. This is a safety process to safeguard the data on the drive.
Press On and Select Button
Now, press the ON and SELECT buttons and hold both of these at the same time for about 5 to 8 seconds to restore the factory default settings on your stereo.
Why Do I Need to Reset JVC Radio?
Resetting JVC stereo is essential when you want to get rid of all the unnecessary settings or configurations that are stored in the system.
For example, if your JVC head unit keeps on changing radio stations by itself even after deleting saved presets then it might be due to some settings malfunction. Resetting would remove these unwanted settings. Here are some of the common problems that you may solve by a reset-
Get Rid of Protect Mode
If you want to remove or disable the protect mode on your JVC stereo, resetting is one of the few ways.
The mode sometimes gets enabled without any known reason and can cause headaches for many car owners. A simple way to solve this is to reset the device so that it turns back to its original factory settings state.
Solve H/W Error
If you’re experiencing a H/W Error message on your JVC stereo, then maybe the head unit is malfunctioning.
The error code generally occurs due to some hardware failure or other problems with reading discs and memory cards. However, the error sometimes pops up despite having everything alright in the system. The only way to get rid of this issue is by resetting the device’s factory settings.
Slow or Laggy Head Unit
If you have a slow or laggy head unit, then it is possible that the system has too many settings and configurations slowing down its performance.
The overwhelming amount of data occupying the storage area may cause poor response times for certain functions such as changing tracks on USB drives or SD cards. Resetting to factory defaults could solve this problem by deleting all the unnecessary data.
Can’t Find What’s Wrong with it
Many times people complain that they don’t understand what’s wrong with it but the system suddenly started misbehaving.
In such a scenario, you can try resetting the JVC stereo system.
It is one of the most effective ways to solve certain problems that may not be solved by anything else. You’ll simply need to follow some simple steps and regain normal functionality in seconds!
Conclusion
Almost all JVC head units have a reset button that is located at the side of the volume control knob or under the faceplate. For those who do not, you need to press and hold down both ON and SELECT buttons for 5-8 seconds to restore factory settings.
If all else fails, check the owner’s manual so that you can find the right way to reset your specific model.